A range hood is an essential kitchen appliance that helps remove smoke, grease, and odors from your cooking space. However, like any household equipment, range hoods can develop problems over time. Understanding these issues and how to fix them can save you time, money, and frustration.
In this article, we’ll walk you through the most common range hood problems and practical solutions to help keep your kitchen ventilation system working efficiently.
Types and Sizes of Range Hoods: Why It Matters for Troubleshooting
Before diving into specific problems, it's important to understand that not all range hoods are the same. The type, size, and installation method can significantly influence the kind of issues you might face and how you should address them.
There are two main types of range hoods:
Ducted Range Hoods: These vent air to the outside. They generally offer stronger suction but can develop duct blockages or installation-related airflow problems.
Ductless Range Hoods: These recirculate filtered air back into the kitchen. They rely on charcoal filters, which can clog and lose efficiency over time if not properly maintained.
Additionally, range hoods come in different installation styles:
- Wall-Mounted Range Hoods: Installed on the wall above the cooktop. They are generally more powerful but may experience issues like noisy operation or wall vibration if not securely mounted.
- Under-Cabinet Range Hoods: Positioned under the kitchen cabinet, these can be either ducted or ductless. Common issues include reduced suction power due to space limitations or blocked venting pathways.
- Island Range Hoods: Installed over a kitchen island. These often require higher suction and can develop stability or grease buildup issues due to their exposed placement.
- Insert Range Hoods: Built into custom cabinetry for a seamless look. Improper installation can lead to airflow inefficiency and difficult access for maintenance.
Size is another critical factor.
Common sizes include 30-inch and 36-inch range hoods, and choosing the correct size affects not just performance, but also potential issues like underpowered suction or excessive noise when the hood is too small for the cooktop.
Knowing your range hood type and size will help you correctly identify the source of the problem and choose the best solution. Whether you’re dealing with a duct blockage in a wall-mounted model or filter saturation in a ductless under-cabinet hood, understanding the specifics can save you from unnecessary repairs.
In the next sections, we’ll cover the most common range hood problems and show you how to fix them based on your hood’s type, size, and configuration.
1. Fan Noise
Problem:
Your range hood is making loud, unusual, or rattling noises during operation.
Possible Causes:
- Loose or unbalanced fan blades
- Grease buildup causing the fan to wobble
- Obstruction causing the fan to scrape against other parts
- Worn or dry motor bearings
How to Diagnose and Fix a Noisy Range Hood Fan?
If your range hood is making noise, follow these step-by-step troubleshooting instructions to pinpoint and resolve the issue:
Step 1: Identify the Source of the Noise
Start by removing the range hood filters and carefully listen to determine which fan is causing the noise. Some range hoods have multiple fans, so it’s important to isolate the problematic one.

Step 2: Cut Off Power
For safety, go to your circuit breaker and turn off the breaker connected to your range hood. Try switching on the fan or light to confirm the power is completely off before continuing.
Step 3: Remove the Protective Grille
Take off any metal or plastic grille that protects the fan blades. This will give you access to inspect the fan closely.
Step 4: Manually Spin the Fan Blades
Wearing protective gloves (as fan blades can have sharp edges), carefully rotate the fan blades by hand. Use a flashlight to check if the blades are scraping against any part of the hood or internal components.
Step 5: Adjust Fan Alignment
If you notice the blades are rubbing, gently push the fan or motor slightly to the left or right to realign it. Spin the blades again to see if the noise improves.
Step 6: Check for Bearing Noise
If the fan makes a high-pitched squealing sound, the motor bearings may need lubrication.
Step 7: Lubricate the Motor Shaft
Loosen the Phillips-head screws securing the bottom panel of the range hood and carefully remove the panel to access the motor.
Using pliers, loosen the bolt that holds the fan blade to the motor shaft, then carefully remove the fan blade.
Spray a penetrating lubricant directly onto the motor shaft.
Manually spin the motor shaft to allow the lubricant to distribute evenly.
If the squeaking noise persists, apply more lubricant and spin again.
Step 8: Reassemble the Range Hood
Reattach the fan blade and securely tighten the bolt.
Reinstall the bottom panel and fasten all screws.
Replace the protective fan grille.
Step 9: Restore Power and Test
Switch the circuit breaker back on and test the fan. The noise should be significantly reduced or fully resolved.
Pro Tip:
Regular maintenance and cleaning of your fan blades and motor area can prevent grease buildup, which is a common cause of fan noise.
2. Range Hood Light Bulb Not Turning On
Problem:
The range hood’s fan is working, but one or more of the lights won’t turn on.
Possible Causes:
- Burnt-out light bulb
- Loose or faulty bulb connection
- Damaged light socket or wiring issue
How to Diagnose and Fix It:
Scenario 1: If the Fan Works but the Light Does Not
If your range hood fan operates normally but the light won’t turn on, the most likely cause is a burnt-out bulb.
Step 1: Cut Off Power
For safety, go to your circuit breaker and turn off the range hood’s breaker. Try switching on the fan to confirm that the power is completely off before proceeding.
Step 2: Remove the Protective Glass Cover
Carefully remove the glass cover that protects the light bulb. Most covers can be twisted off or unscrewed, depending on your range hood model.
Step 3: Remove the Old Bulb
Gently reach in and turn the bulb counterclockwise until it loosens and can be removed.
Some bulbs require only a quarter turn.
For halogen bulbs, carefully pull the bulb straight out from the ceramic power connector.
Step 4: Install the New Bulb
Insert the new bulb and twist it clockwise to secure it.
Important: If you’re installing a halogen bulb, always handle it with a paper towel or gloves. Oils from your skin can cause the bulb to overheat and fail prematurely.
Step 5: Reinstall the Glass Cover
Once the new bulb is in place, reinstall the protective glass cover securely.
Step 6: Restore Power and Test
Switch the circuit breaker back on and test the light. If it turns on properly, the issue is resolved.
Additional Tips:
If the new bulb doesn’t work:
Check the bulb socket for visible damage or corrosion. If the socket is faulty, you may need to replace it or consult a professional technician.
If both fan and light don’t work:
This could indicate a power supply issue or a tripped breaker. Double-check the power connection.
Always use compatible bulbs:
Make sure to replace the light with the correct type and wattage as specified by the manufacturer to avoid electrical issues.
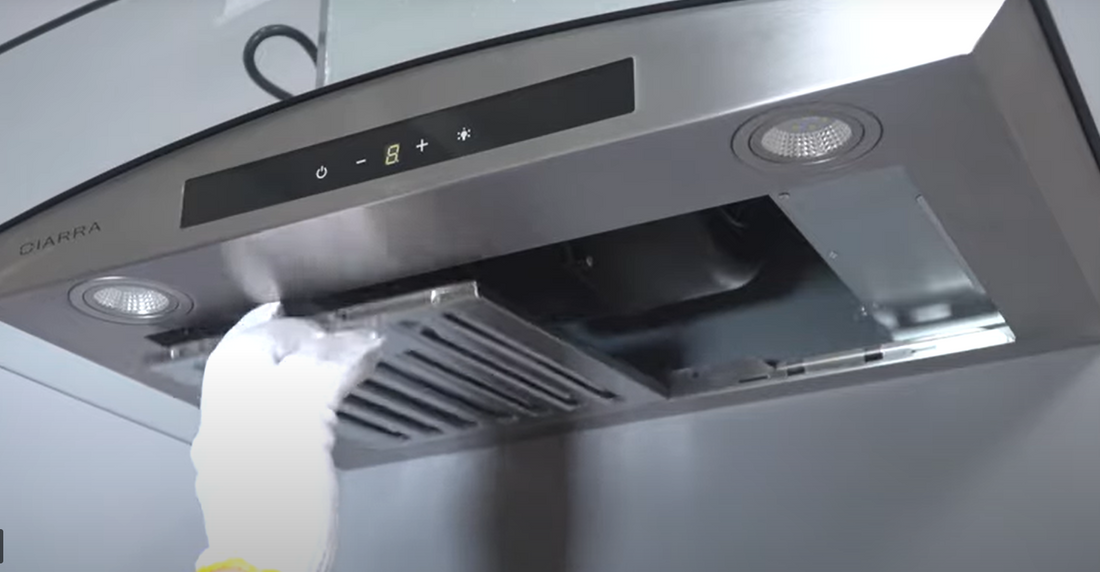
3. The Filter is Clogged or Dirty
Problem:
Your range hood is not effectively removing smoke, grease, or odors. A dirty or clogged filter is one of the most common reasons for weak suction and poor ventilation.
Possible Causes:
Grease, dust, and food particles have built up on the filter.
The filter has not been cleaned regularly.
For ductless range hoods, the charcoal filter is saturated and no longer filtering properly.
How to Diagnose and Fix It:
Step 1: Inspect the Filter
Remove the range hood filter and visually inspect it. If the metal grease filter is coated with thick grease or debris, or if a charcoal filter appears heavily saturated, it’s time for cleaning or replacement.
Step 2: Clean Metal Grease Filters
For metal mesh or baffle filters:
Soak the filter in hot, soapy water for about 15-20 minutes to loosen grease. You can add a small amount of baking soda for extra cleaning power.
Scrub the filter gently with a non-abrasive brush to remove stubborn grease.
Rinse thoroughly with hot water and let it air dry completely before reinstalling.
Optional: Some metal filters are dishwasher-safe. Check your manufacturer's instructions before placing the filter in the dishwasher.
Step 3: Replace Charcoal Filters
For ductless range hoods:
Charcoal filters cannot be washed and must be replaced every 3 to 6 months, depending on usage.
Check your range hood manual for the correct replacement model.

Step 4: Reinstall the Filter
Once the metal filter is clean and dry, or after you’ve replaced the charcoal filter, reinstall it securely into the range hood.
Related: Range Hood Filter Replacement
A Guide to Cooker Hood Filters
4. Unresponsive Controls
Problem:
The range hood’s buttons, touch controls, or remote control do not respond when pressed. You may not be able to adjust fan speeds, turn on the lights, or power the unit at all.
Possible Causes:
Grease buildup on mechanical buttons or touch panels
Faulty control panel or electronic board
Loose wiring or poor electrical connections
Power supply issues
How to Diagnose and Fix It:
Step 1: Confirm Power Supply
Before focusing on the control panel, ensure the range hood is receiving power.
Check if the range hood’s circuit breaker is tripped.
Inspect the power cord and outlet.
Test whether the lights or fan can be powered on. If nothing works, you may have a power connection issue.
Step 2: Clean the Controls
For mechanical push buttons or touch panels:
Turn off the power to the range hood at the circuit breaker.
Gently clean the control area using a soft cloth and a kitchen-safe degreaser.
Make sure no grease or dirt is trapped around the buttons or on the touch surface.
Allow it to fully dry before restoring power and testing.
Grease buildup is a common reason why mechanical buttons or touch panels become unresponsive.
Step 3: Check the Control Panel Connections
If the power is confirmed and the controls are still unresponsive, there may be loose internal wiring.
Accessing the control panel usually requires removing the range hood’s front panel or bottom cover (refer to your user manual).
Inspect all wire connectors to ensure they are secure.
Note: If you’re not comfortable with electrical inspections, contact a qualified technician.
Step 4: Reset the Range Hood (If Applicable)
Some modern range hoods have a reset function:
Turn off the circuit breaker for at least 60 seconds.
Turn the power back on to see if the system resets and the controls respond.
Step 5: Inspect the Control Board
If cleaning and power resets do not work, the control board or circuit may be faulty.
This often requires professional diagnosis and part replacement.
Contact the manufacturer’s customer service or a certified repair technician for assistance.
Additional Tips:
Preventative Maintenance: Regularly clean around the control buttons to avoid grease-related malfunctions.
Use Correct Handling: For touch-sensitive panels, press gently. Excessive force can damage the sensors.
5. Range Hood Won’t Turn On
Problem:
Your range hood is completely unresponsive — the fan, lights, and controls do not work at all.
Possible Causes:
Tripped circuit breaker
Faulty power outlet
Burned-out fuse or wiring issue
Internal electrical failure (e.g., damaged control board or motor)
How to Diagnose and Fix It:
Step 1: Check the Circuit Breaker
Go to your home’s circuit breaker panel and carefully inspect the breaker connected to your range hood.
Look for any breaker that has tripped or flipped into the off position.
If the breaker has tripped, switch it fully to the OFF position first, then back to ON.
Tip: Sometimes a breaker may appear to be in the ON position but is not fully engaged. Flipping it off and on can reset it properly.
Step 2: Test the Power Outlet
Unplug the range hood (if applicable) and test the outlet using another small appliance to see if the outlet is delivering power.
If the outlet is dead, try resetting any GFCI (ground fault circuit interrupter) switches nearby.
If the outlet is burnt, loose, or not working, you may need an electrician to inspect or replace it.
Step 3: Inspect for Visible Damage
Check the power cord for any visible signs of wear, burning, or damage.
Inspect the area around the control panel for any unusual burning smell, discoloration, or melting that may indicate an internal electrical fault.
Step 4: Contact a Professional
If the circuit breaker is functioning and the outlet has power, but the range hood still won’t turn on:
The issue could involve internal wiring, a blown fuse inside the range hood, a faulty motor, or a defective control board.
Preventive Maintenance Tips: How to Extend the Life of Your Range Hood
Proper care can significantly extend your range hood’s lifespan and keep it running efficiently. Here are simple, effective maintenance tips:
1. Clean or Replace Filters Regularly
Wash metal filters with warm, soapy water every month to prevent grease buildup. Replace charcoal or disposable filters every 3 to 6 months, depending on how often you cook.
2. Wipe Down the Exterior
Grease and dust can collect on the surface. Wipe the range hood with a soft cloth and non-abrasive cleaner at least once a month to keep it clean and performing well.
3. Keep Vents Clear
Check and clean vent ducts every few months to ensure proper airflow. Use a brush or vacuum to remove dust and grease, especially if you cook frequently.
4. Lubricate Fan and Motor
Inspect the fan and motor annually. Apply a small amount of lubricant to moving parts to prevent squeaking and ensure smooth operation.
5. Check and Replace Worn Parts
Regularly inspect bulbs, buttons, and wiring. Promptly replace any damaged or worn parts to avoid bigger problems later.
When to Consider Buying a New Range Hood
If you find yourself frequently repairing your range hood, it may be a sign that the appliance is no longer worth fixing. Ongoing malfunctions are not only frustrating but can also lead to high long-term costs. Additionally, if your range hood struggles to effectively remove smoke and odors or if it has become noticeably louder, these are clear indications of decreased performance due to age or wear. Modern range hoods offer significant advantages over older models, including stronger suction, quieter operation, energy efficiency, and smart features like remote or voice control. They also tend to have easy-to-clean filters and improved lighting. Upgrading to a new range hood can not only improve your kitchen’s air quality and reduce energy consumption but also enhance the overall aesthetic of your kitchen. Today’s range hoods are available in a variety of styles and finishes that can either stand out as a design statement or blend seamlessly with your existing decor, making them a smart investment for both functionality and home value.